# Step 4 — Display a single content item

Learn how to render content details with a custom template.

You render a list of all Rides here in the next step. But before that, you can use the existing page layout to render the content of a single Ride.

## Create the Ride view

Create a Twig template `templates/full/ride.html.twig` with the following code:

```html+twig
{% extends "main_layout.html.twig" %}
{% block content %}
<div class="col-xs-10 col-xs-offset-1 text-justified">
    <section>
        <div class="row regular-content-size">
            <div class="col-xs-12">
                <h3 class="center bottom-plus new-header">{{ content.name }}</h3>
            </div>
        </div>
    </section>
    <section>
        <div class="row regular-content-size">
            <div class="row">
                <div class="col-xs-6">
                    <h4 class="underscore">{{ 'Starting point'|trans }}</h4>
                    {{ ibexa_render_field(content, 'starting_point', {'parameters': { 'width': '100%', height: '200px', 'showMap': true, 'showInfo': false }}) }}
                </div>
                <div class="col-xs-6">
                    <h4 class="underscore">{{ 'Ending point'|trans }}</h4>
                    {{ ibexa_render_field(content, 'ending_point', {'parameters': { 'width': '100%', height: '200px', 'showMap': true, 'showInfo': false }}) }}
                </div>
            </div>
        </div>
    </section>
    <section>
        <div class="row regular-content-size">
            <div class="col-xs-12 padding-box">
                <div class="col-xs-2">
                    <div class="box-ride">
                        <p class="special-number">{{ ibexa_render_field( content, 'length') }} km</p>
                    </div>
                </div>
                <div class="col-xs-8">
                    <h4 class="underscore">{{ 'Description'|trans }}</h4>
                    {{ ibexa_render_field( content, 'description') }}
                </div>
            </div>
        </div>
    </section>
</div>
{% endblock %}
```

This template reuses `main_layout.html.twig` and again places the template in a `content` block.

> **Tip: Previewing available variables**
>
> You can see what variables are available in the current template with the `dump()` Twig function:
>
> ```html+twig
> {{ dump() }}
> ```
>
> You can also dump a specific variable:
>
> ```html+twig
> {{ dump(location) }}
> ```

Now you need to indicate when this template should be used.

Go back to `config/packages/ibexa.yaml` and add the following configuration (under the existing `content_view` and `full` keys:):

```yaml
site:
    content_view:
        full:
            # existing keys, don't change them
            ride:
                template: full/ride.html.twig
                match:
                    Identifier\ContentType: ride
```

This tells the application to use this template whenever it renders the full view of a Ride.

## Check the Ride full view

Because you don't have a list of Rides on the front page yet, you cannot click a Ride to preview it. But you still can see how the template works in two ways:

### Preview in the back office

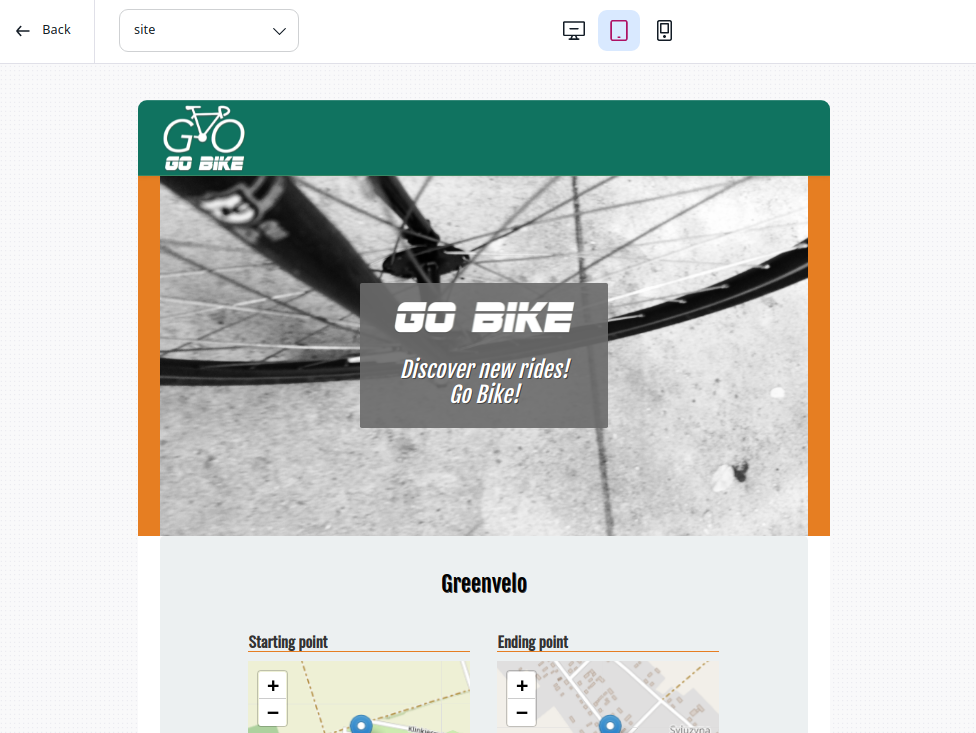
You can use the [preview](https://doc.ibexa.co/projects/userguide/en/5.0/content_management/preview_content_items/) while editing in the back office to see how the content is rendered in full view.
![Full ride preview in admin](https://doc.ibexa.co/en/latest/tutorials/beginner_tutorial/img/bike_tutorial_preview_full_ride.png)

### Go to the Ride page

You can also go directly to the URL of a Ride.

The URL for a Ride content item located in the "All Rides" Folder is `http://<yourdomain>/all-rides/<ride-name>`.
